5 PROBLEMS WITH 3D PRINTING AND THEIR SOLUTIONS
Share
Whether it's a problem of deformation or under-extrusion, thanks to the correct advice and techniques you can easily solve problems with 3D printing. In this article dedicated to common problems with 3D printing and their solutions, we show you some of the most common problems you can encounter when printing and ways to solve them. So to the heart of the matter.
The importance of troubleshooting with 3D printing
Troubleshooting is a key part of 3D printing to consistently achieve high-quality prints. Furthermore, it allows you to reduce costs and the percentage of waste and keep the printer in good condition. Other benefits of troubleshooting include:
- Improve the precision and accuracy of functional parts.
- It helps pinpoint the source of the problem so you can quickly take corrective action and minimize damage.
- The troubleshooting process helps you better understand your printer and recognize its capabilities and limitations, allowing you to make precise adjustments the next time you print.
- It helps to understand the pattern of recurring problems and take preventive measures.
- The experience gained in troubleshooting helps improve the overall efficiency of 3D prints, making them more interesting.
So, what are the most common 3D printing problems? Discover them below.
Bad bosses
Definition and causes of bad protrusions
The problem of bad overhangs arises when the printer cannot print angled or horizontal surfaces that protrude from the shape of the model. Inadequate support structures, poor adhesion and high print speed cause this problem, resulting in sagging and falling.

Tips and techniques for eliminating protrusions
To resolve this issue, follow these directions:
- Use appropriate support structures established by the slicing software.
- Decrease the print speed to allow each layer to solidify enough to eliminate drooping.
- Improve the cooling system or use more fans to solidify the printed parts faster.
- To improve adhesion and support, consider using supports.
- Adjust the density of the support to find the balance and not have to struggle to remove it.
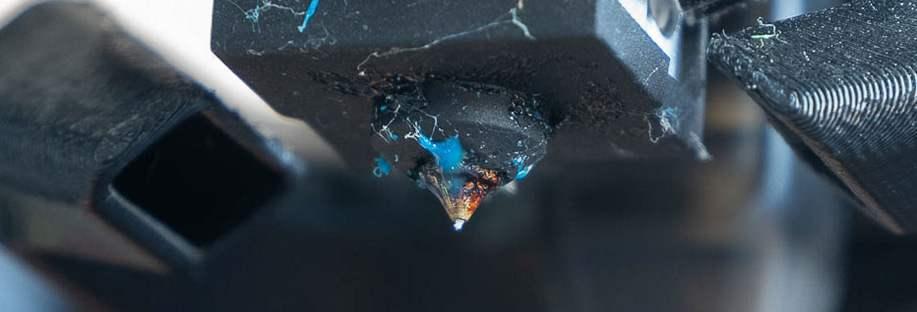
Clogged nozzle
Understand nozzle clogs and their causes
Residual filament left over from previous prints often causes this problem, causing the nozzle to clog and prevent melted filament from passing through. This can cause warping in the print. This problem is caused by incorrect retraction and print temperature settings, debris, and dust.

A step-by-step guide to clearing a clogged nozzle
The way to fix this problem is to unblock the nozzle. To clean the nozzle you must:
- Heat the nozzle to the temperature recommended by the manufacturer of the blocked filament, so that the residue melts.
- Extrude the filament carefully following the instructions in the manual.
- Use a flashlight to check if there is any debris left in the nozzle and clean it if necessary.
- To do a thorough cleaning, use the cold pull technique, which involves using a high temperature to heat the nozzle, cool it a bit, and push a different colored filament to maintain pressure to get everyone out the debris.
- Repeat the steps until the nozzle is thoroughly cleaned.
- Run a few test prints to verify that the nozzle is no longer clogged.
Adhesion of the first layer
The importance of correct adhesion of the first layer
To ensure a stable print base, it is essential to ensure that the first layer adheres correctly. If the first layer adheres properly, the chances of print failure, layer chipping and warping are reduced.

Tips and tricks for achieving optimal first layer adhesion
To make sure the first layer sticks properly
- Level the print bed properly and always clean it before printing.
- Use adhesives such as hairspray or glue sticks.
- Adjust the nozzle height to ensure correct extrusion.
- Increase the printing temperature to lower the speed and achieve better adhesion.
Stringing
Causes and prevention of stringing
Stringing is among the most common 3D printing problems that occur due to slow retraction speed, inadequate cooling, excessive retraction distance, incorrect filament or slicer diameter adjustments. The result is that the filament oozes causing cord-like structures.

Methods for reducing or eliminating strings between molded pieces
- Adjust the retraction distance and improve its settings.
- Adjust the nozzle temperature.
- Use multiple fans to speed up the cooling process.
- Calibrate the slicer and filament diameter.
- Enable the slicer function dedicated to reducing stringing problems, if available.
Deformation
Definition and causes of deformations in 3D prints
Warping is the phenomenon where the corners of the print lift or warp. It happens mostly due to poor bed adhesion, lack of support, thermal stresses and inadequate cooling.

Techniques to prevent or limit the effects of deformation
- Use adhesive aids, a cover or a heated print base and level it properly.
- To ensure stability, use appropriate supports.
- Select a quality filament known for its low chance of warping.
- Adjust the printing speed and temperature.
The 3D printing problems mentioned above are the ones that occur most frequently in printing. However, thanks to our troubleshooting techniques, you will be able to avoid them and get high-quality 3D prints without any errors.


 https://www.instagram.com/3digital.tech/