Today's printer is the brand new one QIDI Q1 PRO , I finally managed to publish a review a few days after the official presentation and not after several months. I'll be honest, when QIDI (who I thank very much for the unit sent) proposed me the review of a new "small" format 3D printer I immediately said no, I wasn't interested in a new variant of the existing one X SMART 3. Except then I read the features on the flyer they sent me and I said to myself: “this is curious, it's better to do a test”. For the features it has, it is really worth considering, easily comparing it to the Creality K1, Flashforge 5M PRO and Bambu Lab P1S. Don't ask me about the Phrozen Arco, it's in another market segment 😉
Frame/Body/Chassis
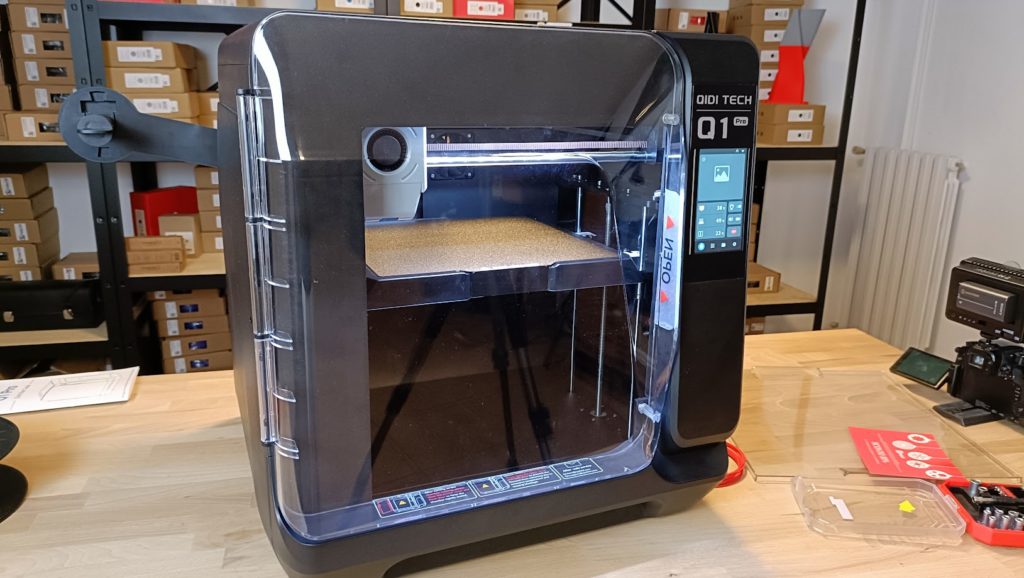
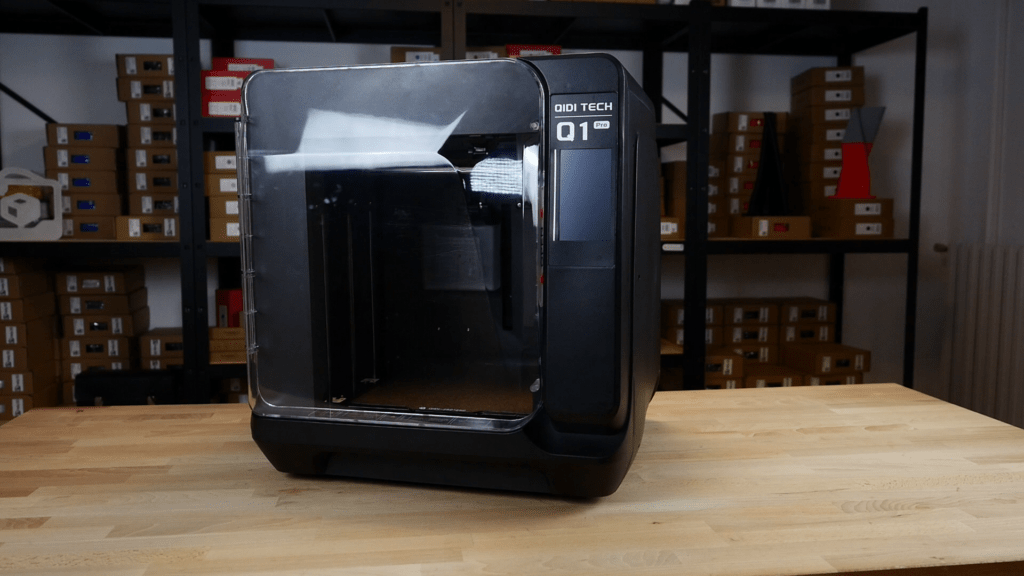
Much of the review can easily overlap with that of the QIDI X PLUS 3 that I did at the end of 2023, give it a read/view because you will see many points in common between the 2 printers. As usual, a nice plastic body that hides a solid metal frame, not excessive weight of about 17 kg. On an aesthetic level we are still well behind the competition but at least this time QIDI has tried to create more convincing lines compared to the usual horrible plastic boxes. The feeling is of a "cheap" product but in reality it is not at all. Much smaller footprint of the printer in the face of an obvious reduction in the print volume which goes to 245X245X245 mm, perfectly in line with competing products .
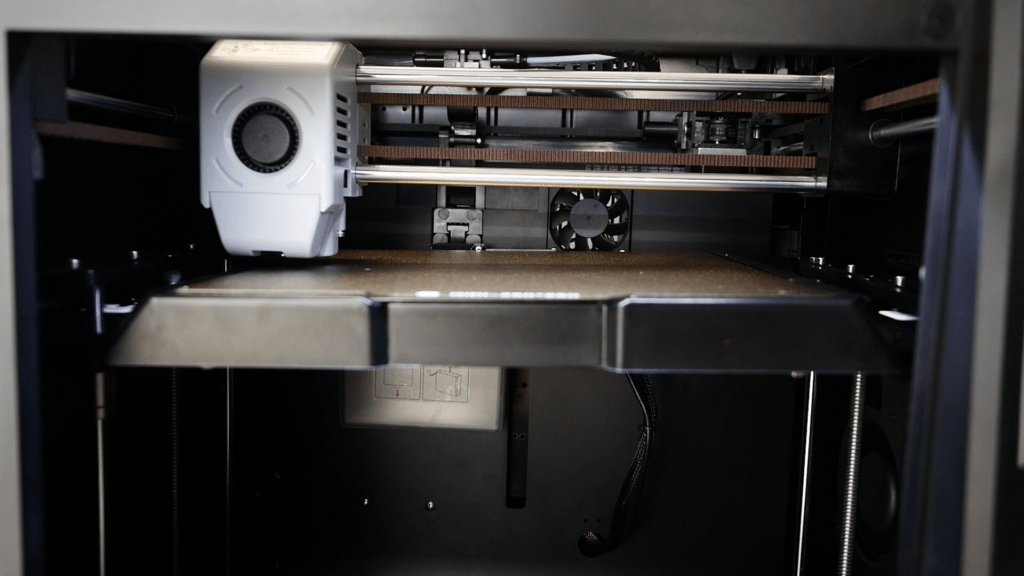
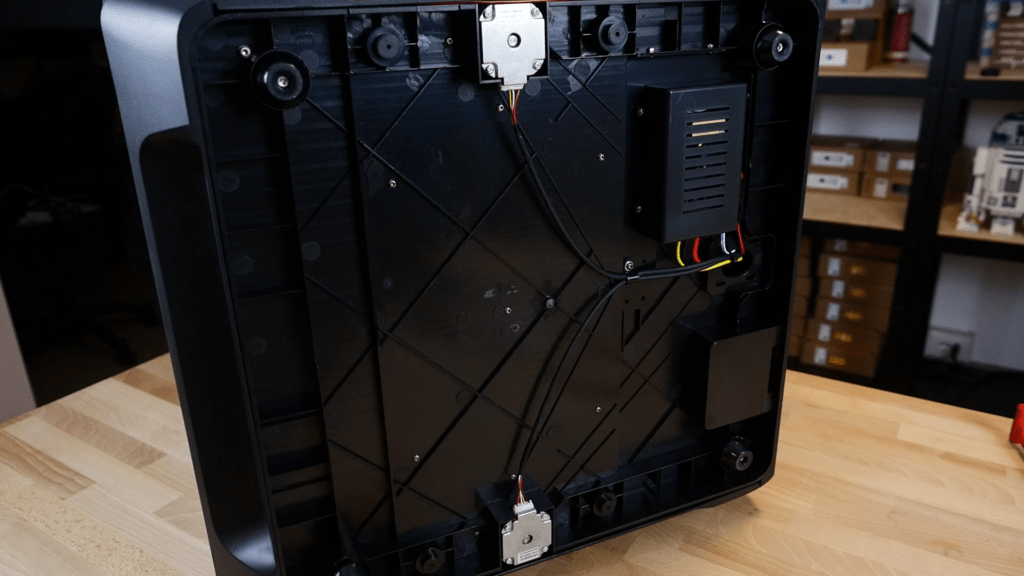
Usual CoreXY movement with 8mm bars on Y + LM8UU bearings and 10mm bars on X (slots) with the omnipresent self-lubricating bushings with graphite inserts, the belts are no longer Gates but a Chinese brand that I had never heard of. Excellent smoothness of the X if compared to the K1 of Creality. The novelty comes into play on the Z , there is always a double trapezoidal bar to move everything but instead of a single motor and a timing belt, we find 2 separate engines (with 2 dedicated stepper drivers). There is no real motivation behind this technical choice, they probably saw that it was more of a pain to align the two bars with a belt rather than having automatic adjustment via firmware and leveling sensor. Before each print start it automatically performs a leveling of the two heights to bring the bed “even”. Be careful NOT to confuse it with the LEVELING and the generation of the compensation mesh of the bed. They are two different things.
Compared to the X PLUS 3 I noticed much less creaking from the heating/cooling of the chamber.
NOTE: Horrible and not very functional reel support… a remake is needed!
Print plan
As said before the plan is a 245X245 mm and from the technical sheet it promises a temperature of 120°. With thermal camera and laser pointer I actually measured about 115° , reached in less than 10 minutes (it takes about 6 minutes to reach 90°). Nice uniform temperature even on the sides and without spots that are markedly warmer than others. In the Q1 PRO we find a 24V heated floor powered by a PSU of about 350W. The classic “textured” magnetic plane in double-sided PEI completes the picture, there are no plans with different surfaces but being of the magnetic type it is not difficult to find competing ones of the correct sizes.
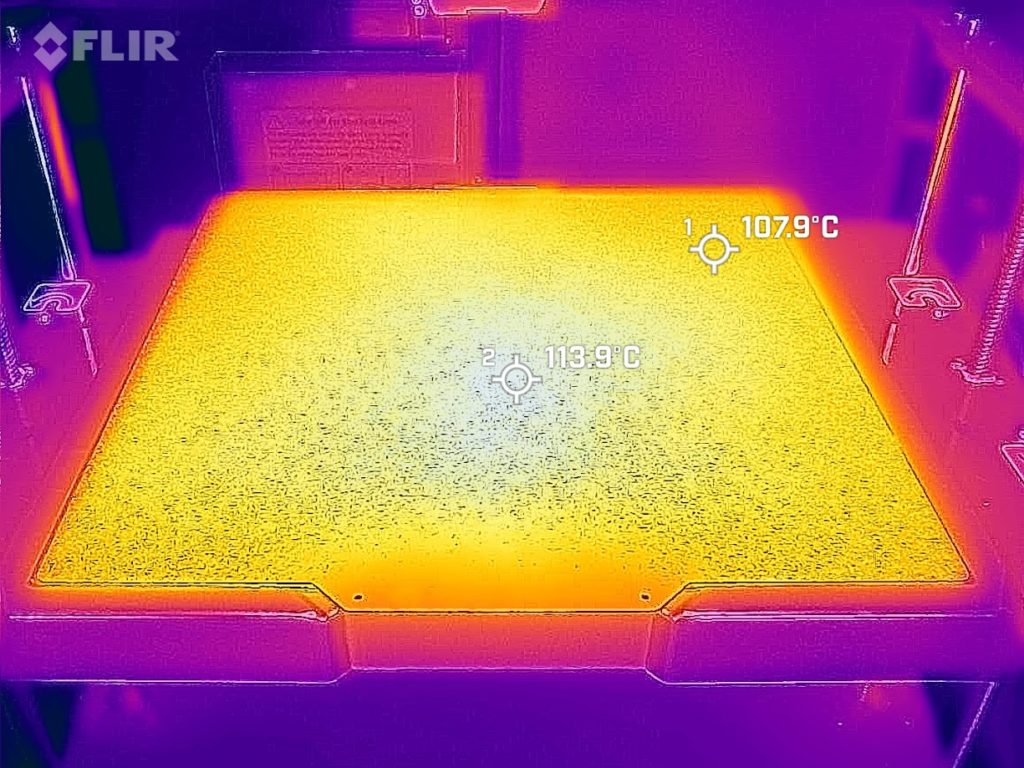
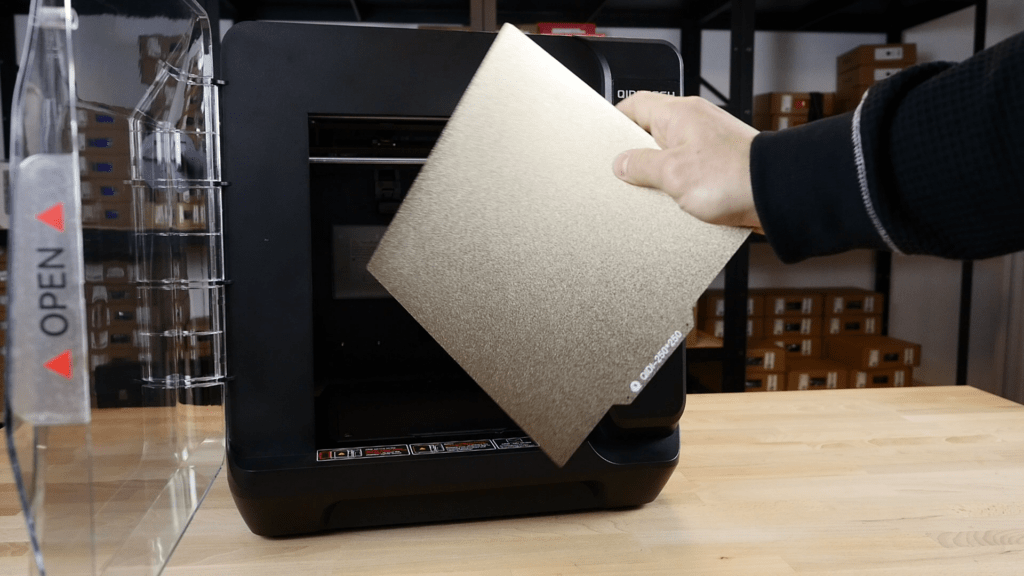
The novelty lies in the leveling of the plane: more than novelty we speak of redundancy or "ease of use", the addition they made was not really necessary. Basically the printer levels itself with 2 sensors:
- That of proximity as on the X PLUS 3, it takes care of the real leveling of the plane and the acquisition of the plane's point matrix (uses KAMP as a plugin)
- 3 load cells placed under the floor: just like on Creality K1 and Bambu Lab, but unlike the latter it is not used to level the bed but to calculate exclusively the Z offset. With only the proximity sensor or a classic probe like on the X MAX 3, every time you intervene on the nozzle/nozzle it is always necessary to re-adjust the Z offset of the first layer. With the load cells there is no need because the printer calibrates this height at each print simply by touching the bed in the middle.
- There is an “old style” calibration routine which allows you to act on the 3 knobs of the load cells to level the bed with the sheet of paper in such a way as to obtain minimal compensation from the firmware during printing.
- Good final result of the leveling mesh, nothing to report but certainly not a rectified plane. A deviation of about 0.3 mm in my case between the highest point and the lowest point. As usual, be careful to redo the leveling mesh for the high T of the floor chamber…
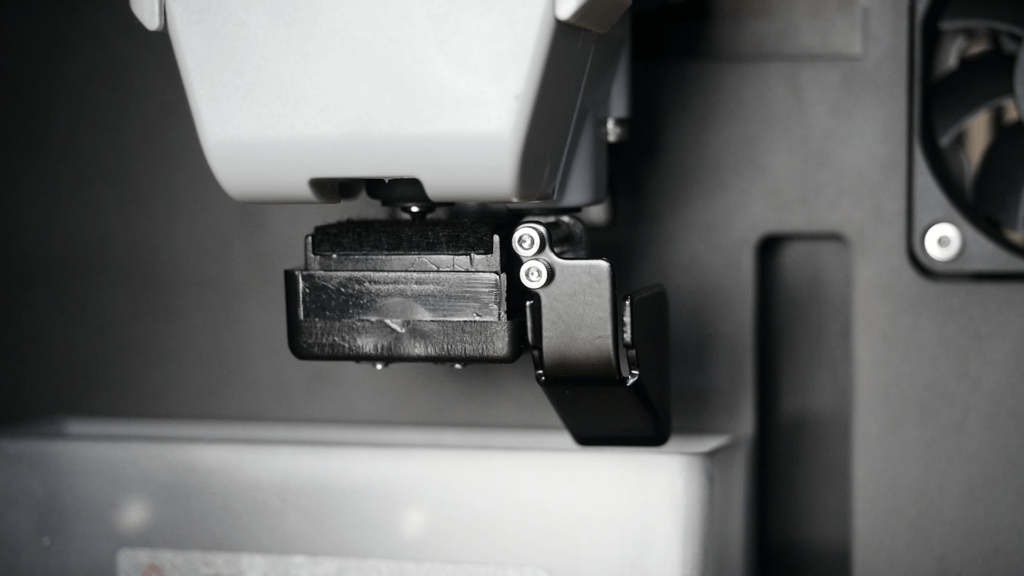
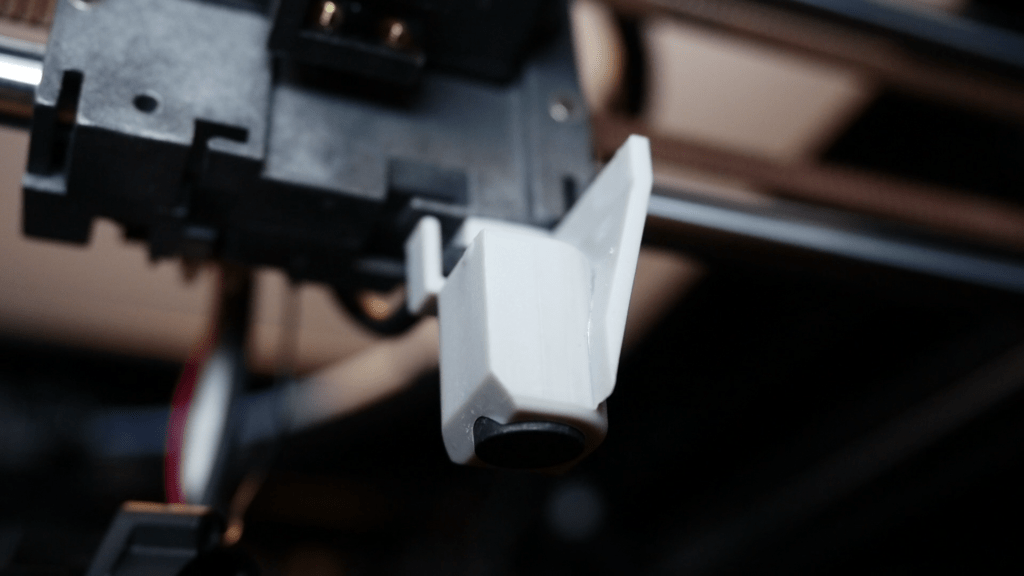
Since there was a calibration with the load cells, a nozzle cleaning system ? At first I thought it was a copy/paste of the Bambu Lab one, but it actually turned out to be profoundly different and effective at the same time. It's a shame that it seems like it's about to disassemble immediately but everything is regular, it seems to be resistant despite moving and flexing a lot. The mechanism is activated when the carriage goes into a certain position, it pushes it out with a lever and then the whole nozzle cleaning routine begins: preheating, extrusion, cleaning on a roller and final cleaning of the nozzle on a fabric-like pad (there are spare ones in the package). I find this solution much more suitable than the one adopted by Creality K1 and Bambu in wanting to clean the nozzle by dragging it in an area of the surface (in the K1 C they put a silicone pad). Finally, a small (and convenient) basket for recovering the waste.
I don't have much sympathy for the proximity sensor. because it ties you to having to use print beds that are actually detected by the sensor (ferromagnetic). If you try to use a glass bed, for example, the detection of the bed will be carried out on the underlying base (if it can detect it) and not on the actual glass surface. It would have been nice to give the double possibility of being able to perform a possible complete probing with the load cells instead of the proximity sensor, by working on the configuration files it would be possible to try if you wanted…
Extruders and Hotends
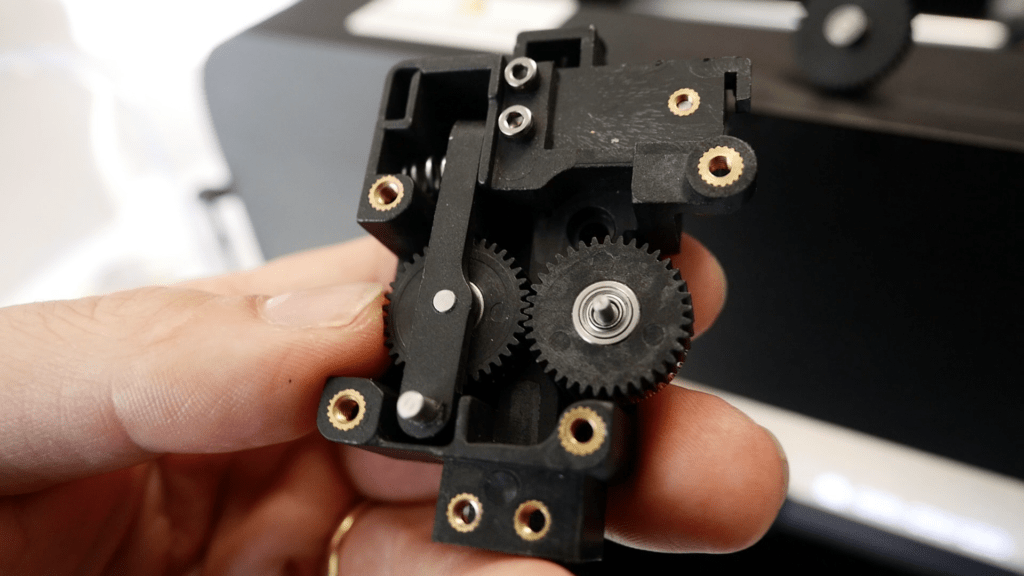
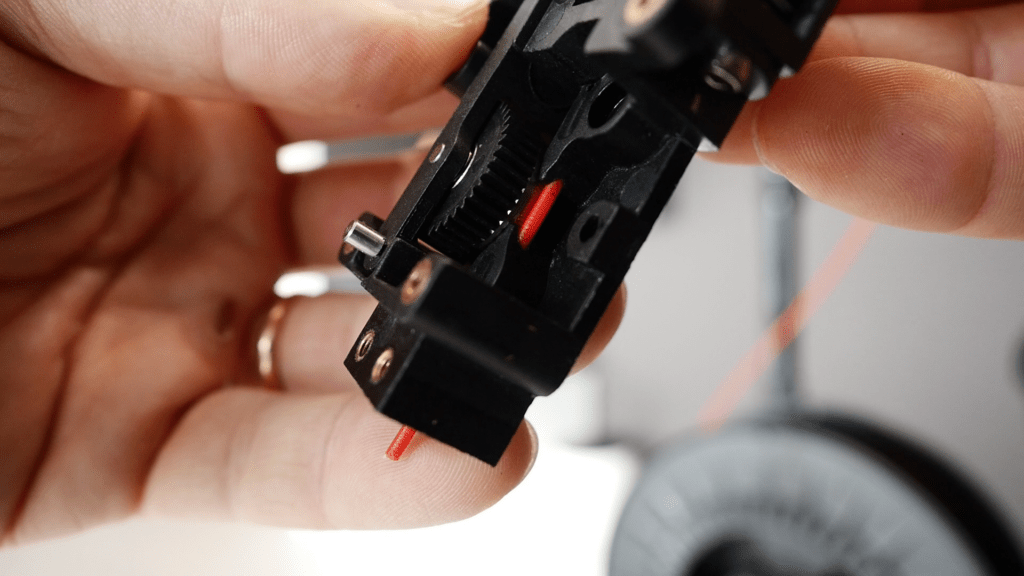
The feeder/extruder part remains unchanged compared to the X PLUS 3, double knurled wheel “large” steel, mixed plastic/steel gears, non-adjustable spring in preload that pushes one of the two knurled against the other. The filament channeling is well done and is suitable for printing even flexible filaments. Very simple but effective extrusion group, already tested properly in its time on the X PLUS 3 with excellent results. Accessibility for maintenance is also very good, with two screws the entire feeder remains in your hand and you can operate safely resting on the workbench. Too bad that for the hotend you have to remove the entire cover behind (4 screws) to detach the fan and sensor plugs.
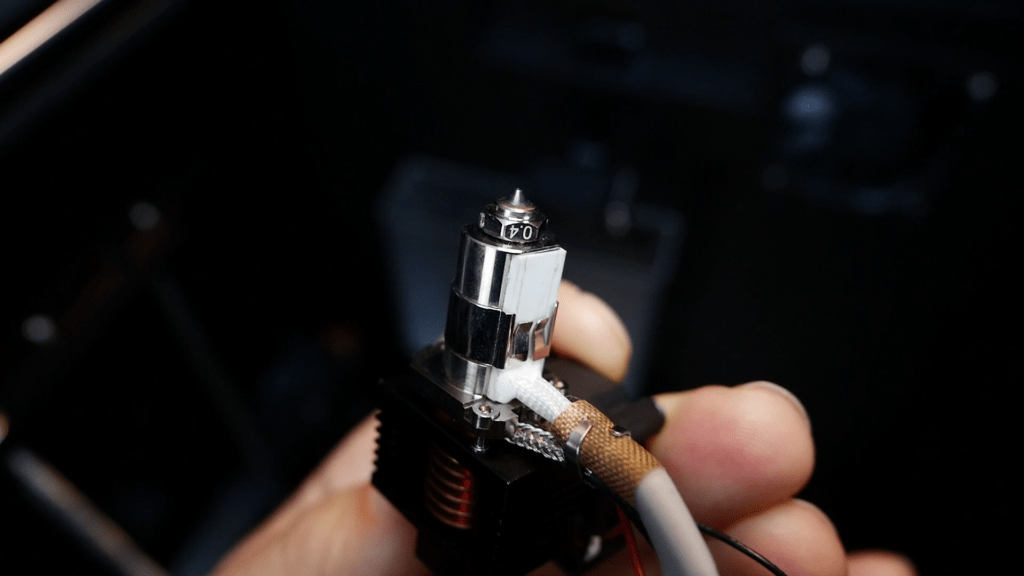
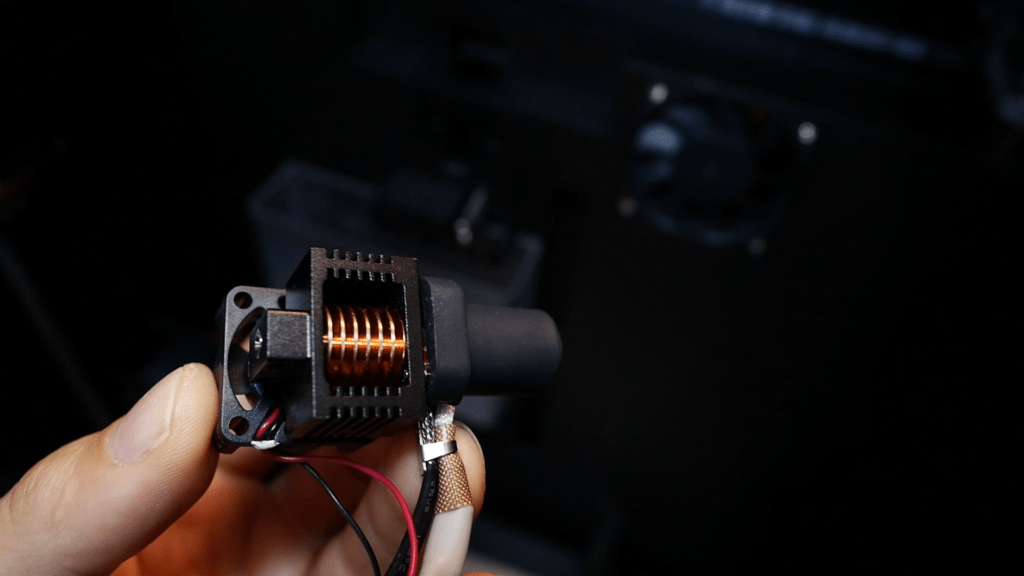
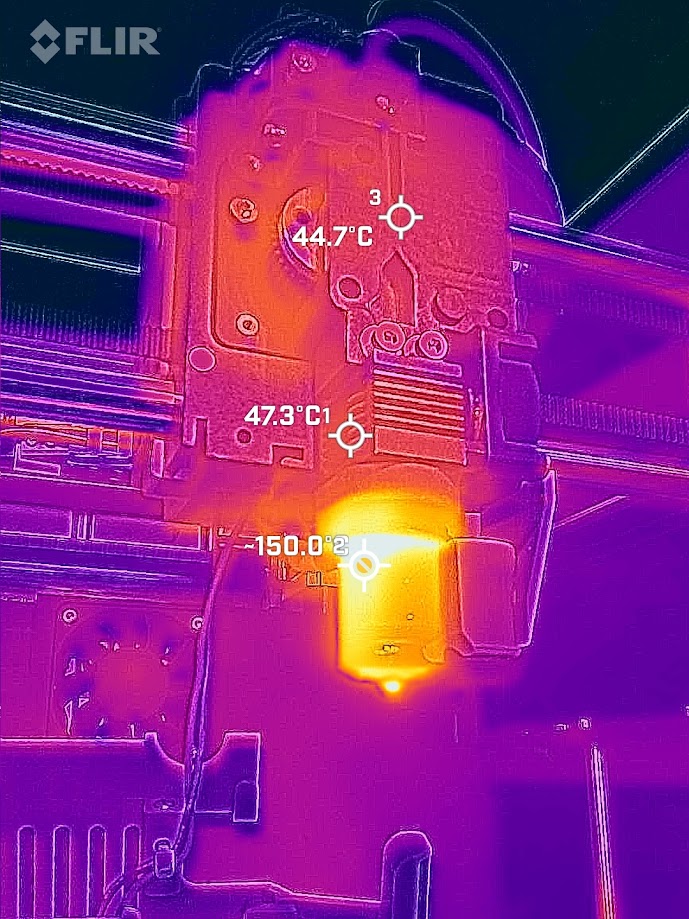
The hotend is completely new, longer and with a “melt zone” longer by about 5 mm. The heatsink has also changed, going from a finned aluminum block to an aluminum casing with a copper radiator inside. The usual copper/steel bimetallic throat while the 3 studs hold the throat firmly to the heating block to prevent it from breaking when changing the nozzle. The latter is similar to the E3D Volcano but is actually slightly shorter, it is of the “bimetallic” type (it too…) with an external part in nickel-plated copper with the only steel tip (it is an insert). In this way the advantages of copper's thermal conductivity are combined with the wear resistance of steel. It is suitable for printing filled materials such as classic PLA and PETG. Maximum temperature 350° actually reached, really quick to warm up starting from room temperature (0-280° in 1 dry minute)
NOTE: as already said other times, when working in a closed and heated chamber you have to take into account the temperatures that develop in the extruder area. DO NOT print PLA or PETG with the closed and heated chamber or you will find the machine blocked after a short while!
NOTE 2: the protective cover is now magnetic and no longer snap-on. However, I find the magnets really not very “strong” but I must point out that despite the accelerations at 20K it has never come off.

There are then two new features related to filament control, a very intelligent one and a potentially VERY intelligent one but badly used :
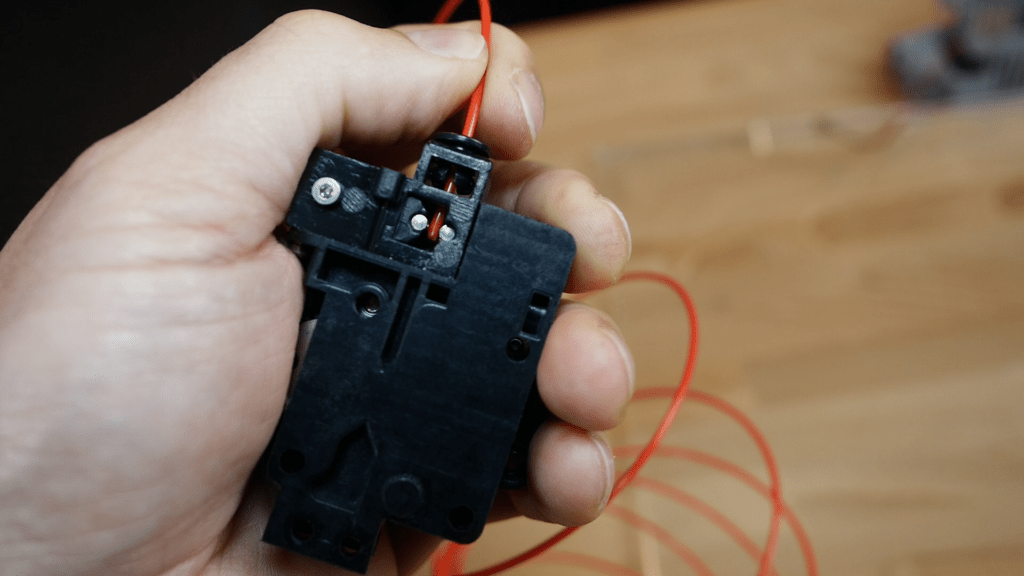
- A new sensor has appeared where the filament is inserted, very simple in concept, but effective only on one occasion: when the spool twists . The sensor is made up of a small slide mounted on a spring that moves only when the extruder pulls the material but the spool does not want to unwind. The more it pulls, the more the slide moves, activating the sensor and pausing the print. Really simple but effective , you just need to review the actuation times for a moment, which in my opinion intervene slightly late. NB: this sensor does NOT intervene if the filament gets stuck in the extruder, it is therefore not a rotary encoder that detects the sliding of the wire.
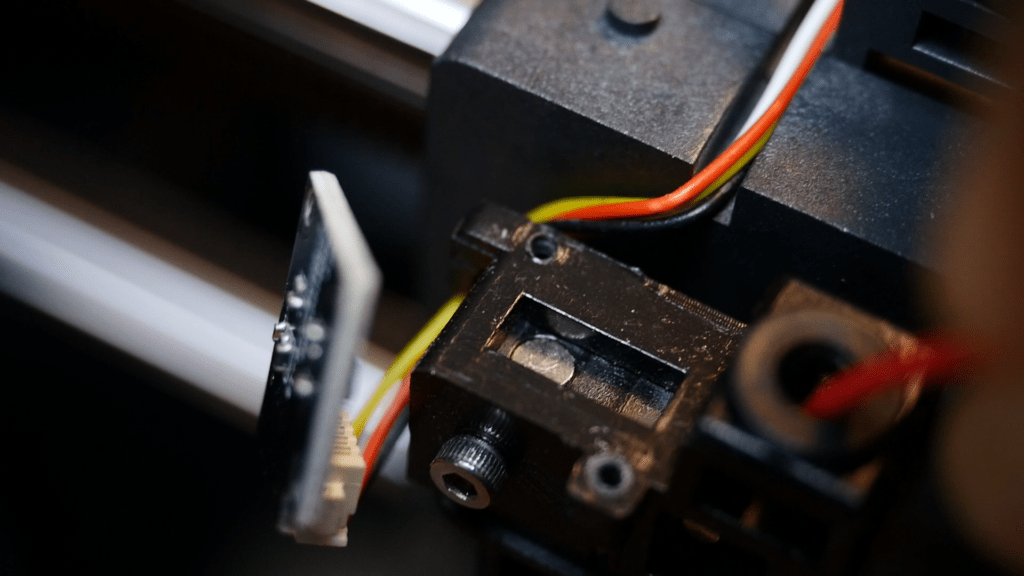
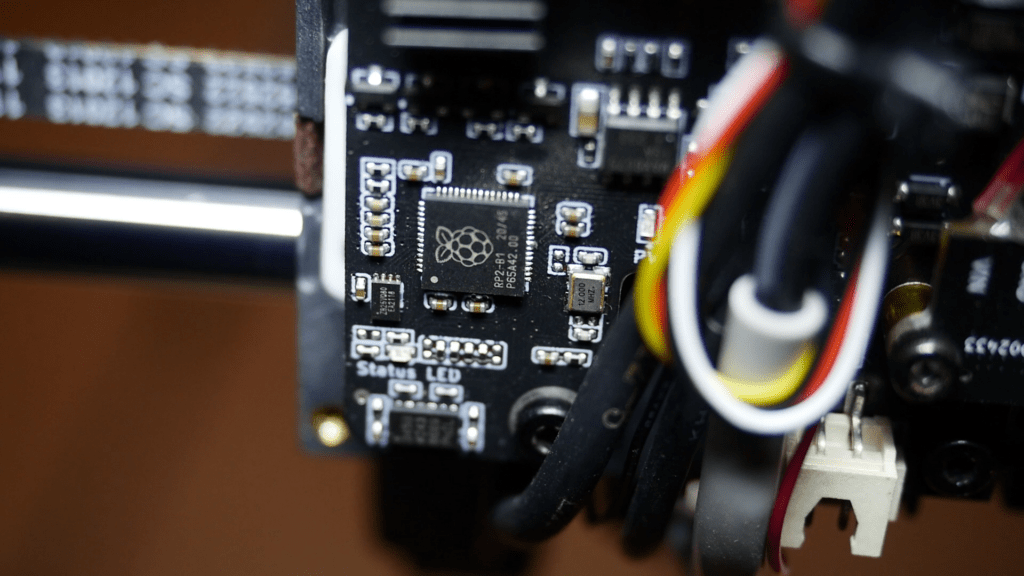
- On the extrusion head, at the entrance of the filament, a small printed circuit board has appeared which is nothing more than a filament presence sensor . At first glance it seems like the classic "there or not" sensor but looking more closely at how it is made and comparing the data entered in the Klipper configuration parameters I discovered that it is actually a hall effect sensor for measuring filament diameter ! Too bad Qidi confirmed to me via email that it was not activated for measurement but only for the presence or absence of the filament. However, I verified that the sensor works and that it would be possible to activate it to compensate for the variation in flow based on the filament diameter. Only note: the diameter measurements are not perfect , there are reference calibration values but it may be that each sensor needs to be fine-tuned using rods with a calibrated diameter. That's probably why they didn't activate it with this feature.
Electronics / Connectivity / Firmware
I copy and paste the part of the X PLUS 3 review with some changes:
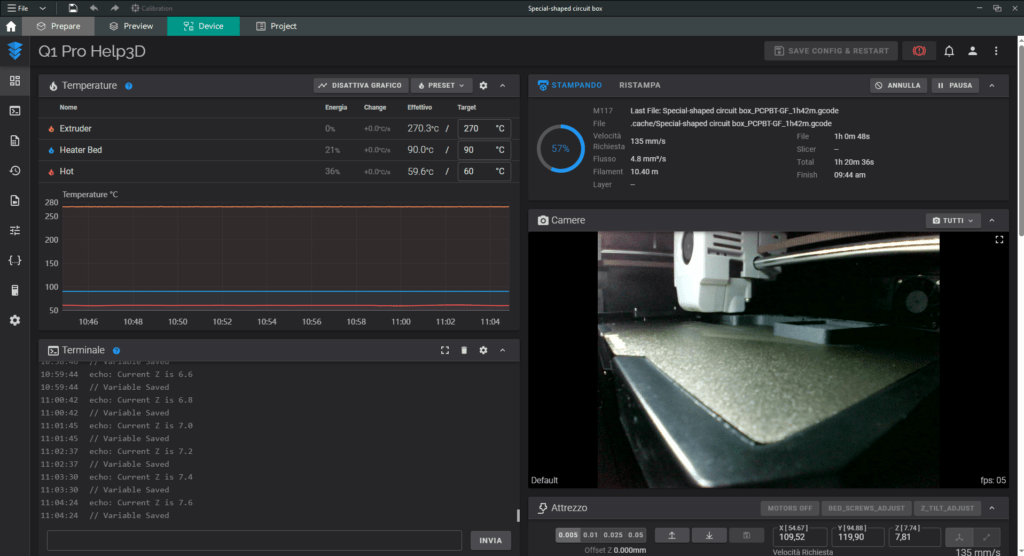
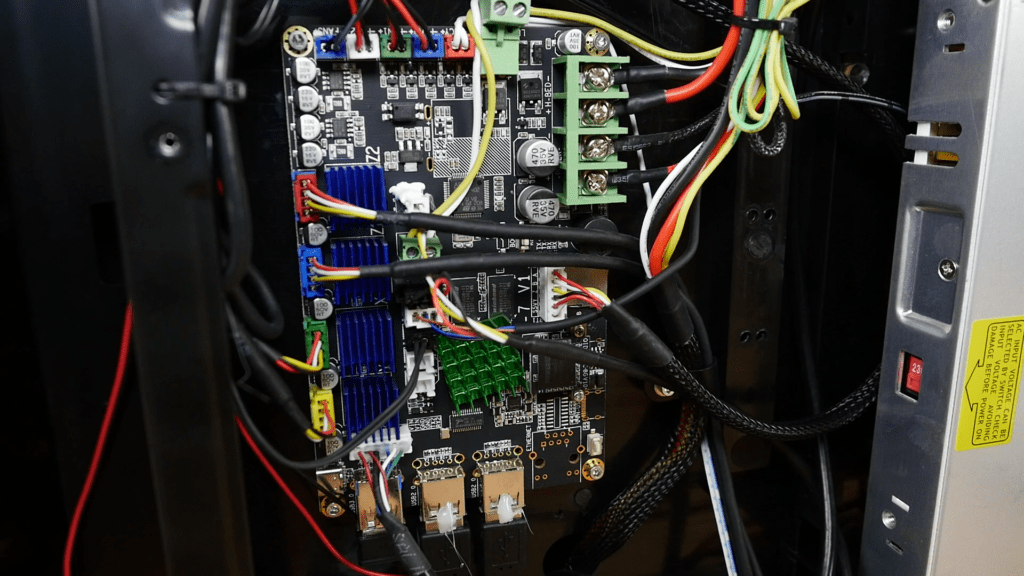
There is not much to say, the card is an MKS with a Cortex-A53 64-bit processor running at 1.5Ghz with 1GB DDR3 RAM . Curiously, compared to the classic MicroSD, a removable eMMC memory is used 32 GB . The firmware that manages everything is the very famous Klipper, directly installed and managed by this card. It can be controlled comfortably from a local network through the interface FLUIDD (an alternative to Mainsail). Everything conveniently at hand , graphs, reports, configuration files: excellent for geeks, for the less experienced it would be worth blocking at least the part relating to firmware settings. A smartphone app has also appeared to control it remotely, it appears to be in BETA phase and I have not tested it yet. For those who want it, you can find it at this link.
NOTE: The Webcam has finally appeared too! No need to buy it separately anymore.
The monitor is still a 4.3” touch screen, the interface is not very beautiful but all the functions that the average user requires are present and easy to reach. In terms of graphics we are a few steps below K1 or Bambu , in reality I discovered that they don't even use Klippy Screen but their own version that communicates serially with Klipper, I don't understand why... Furthermore, loading previews is quite slow.
TMC2209 driver for Z axis while TMC2240 for X and Y with sensorless homing. Separate hotend management board that communicates with CAN-bus protocol, has its own dedicated MCU and integrates both the TMC2209 driver of the extruder and the ADXL345 accelerometer for the detection of resonance frequencies and input shaping regulation. The fans and the filament presence sensor are then connected to this.
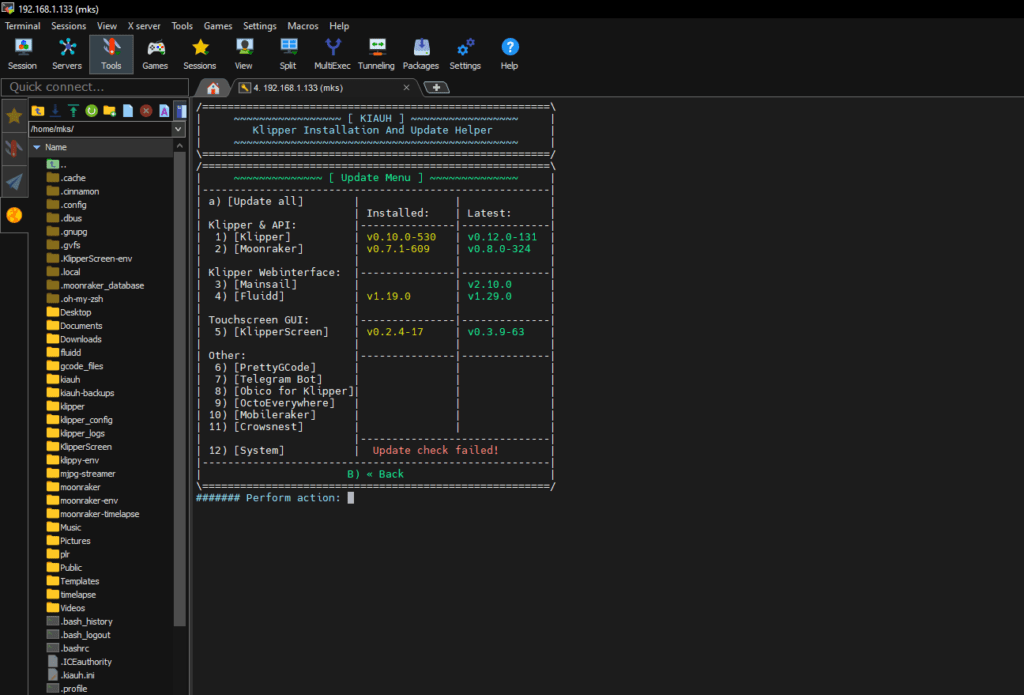
WIFI Connectivity (why did they put a USB stick ??), Ethernet not present even if the board is predisposed. External USB port available for loading files from a stick. As said before it mounts a version of Klipper even if this is actually very old, the release dates back to 2022. Same thing goes for the Fluidd interface. I still don't understand why they don't want to stay updated with the latest Klipper releases, I can understand being a few months behind but not years! Net of this "problem" the printer still works well and that's what matters. However, having it updated to the latest security and functionality releases wouldn't be bad...
For the more geeky QIDI thought it best not to block it and leave the SSH connection open and free to do what you want (at your own risk of course. These are the access data:
- Username: root
- Password: makerbase
To run scripts not as root but as user, QIDI has already created the following:
- Username: mks
- Password: makerbase
They even left KIAUH installed 😀!
Complete it all with a Single 350W power supply (it is not MeanWell) is used to manage the heating of the print bed and all the connected electronics (motors, hotends, cards, fans, etc. etc.). Another 300W are instead absorbed by the chamber heating fan which is powered directly by 220V (with a dedicated controller).
As slicing software they provide Qidi Slicer which is a rebranded version of Prusa Slicer but profiles are already available for Orca Slicer. The printer connects directly to the Slicer and you can send files to the printer and control it without having to open a web page.
The heated room
QIDI workhorse , undeniably it brings its big advantages with technical filaments. Don't expect crematorium oven temperatures (it is not insulated at all) but it holds its very honest 60° (65° detected by thermocouple) very well. I was hoping it would take less time to heat up compared to the X PLUS 3 given the reduced print volume, from room temperature to 60°C (with a 90° plate) it takes about 20 minutes . For the rest of the printing, however, it remains pretty constant and does not fluctuate at all.
If you are looking for a printer to print only PLA and PETG I'm sorry to disappoint you but the hot chamber is useless, in fact, it makes the situation worse and ends up blocking the extrusion. Use it ALONE for materials that require it (PC, PCPBT, ASA, ABS etc. etc.). PLA and PETG should even be printed without a lid and with the door open!
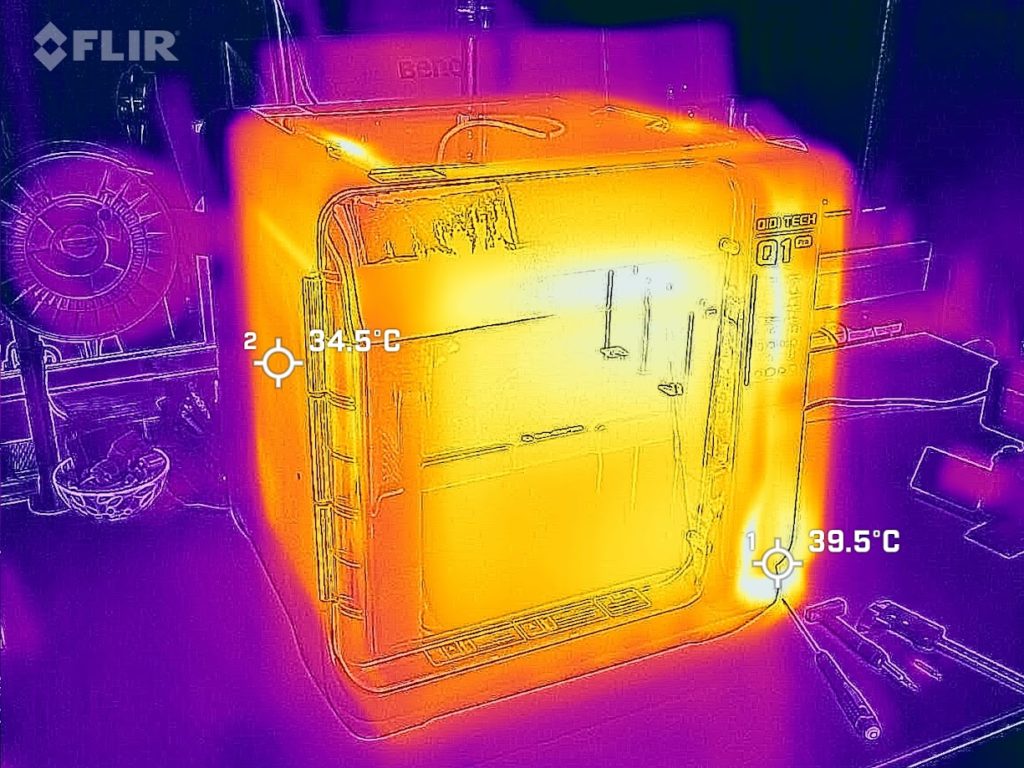
There is an internal T-regulating fan in the chamber that only expels air. There is no HEPA/activated carbon filter but it is really easy to apply one. I am just wondering why the fan does not rest directly on the external body ... the way they positioned it actually discharges the hot air from the chamber partly into the electronics compartment! I need to make a small air duct that brings the flow directly to the grill of the rear cover and I will also mount a small filter on it.
It creaks a lot less than the X PLUS 3 , an aspect that many people don't notice but which I pay a lot of attention to. Remember that the body is all plastic and it's very normal during the heating/cooling phase to feel the plastics settling!
NOTE: the same problem with the magnetic plate remains. Hot chamber does not mean ZERO warping! Remember that if the piece is adherent to the magnetic plate then it pulls up nicely… the hot chamber does not limit this phenomenon, to avoid it you need to switch to rigid plates. In this case the combination is winning and definitive against warping of materials such as ABS or PC.
Performance, consumption and noise
It's useless for me to do a thousand tests, all these new printers that are coming out are really fast and print very well right away. The QIDI ones in particular do not suffer from any X-axis vibration problems like the Creality K1, the only precaution is to ALWAYS keep the X bars clean because they get stuck easily after a bit of use. Especially for those who print ABS, ASA or other loaded ones that emit abundant UFP. Get into the habit, and this applies to ALL printers with self-lubricating bushings, of cleaning the X bars well with alcohol. QIDI then suggests lubricating them but personally I just clean them and that's it.
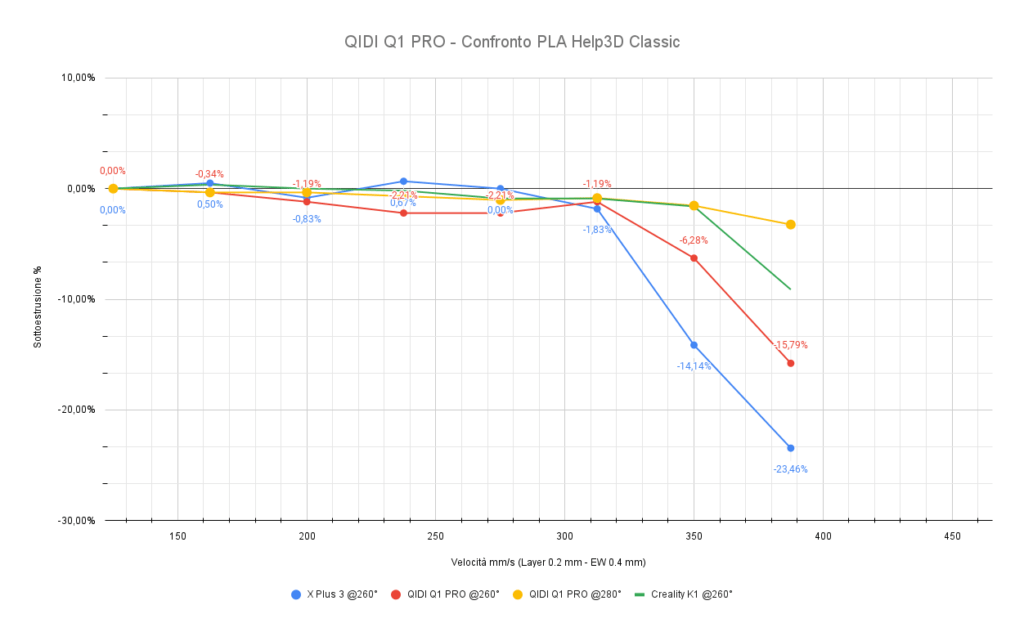
The Q1 PRO It travels pretty fast , it handles accelerations from 20K with ease as well as speed over 300 mm/s . But let's stop this frantic search for extreme speed... we are already traveling at speeds that were unthinkable 2 years ago. In particular I point out that the technical materials, especially the loaded ones, NOT can be printed at high speeds. If you want to do speed races then stick to PLA and some PETG or ABS, but if you have to stay on the functional you'll have to kiss your hands if you reach 150 mm/s with some materials.
The hotend, although it has a 5mm longer “melt zone” than the X PLUS 3, does not have much superior performance. Of course, with the PLA at 280° I achieved volumetric flow rates close to 30 mm3/s (about 370 mm/s of effective printing speed) but we are at really limit values. For PLA 250/300 mm/s are more than honest and easily reachable by this printer. I did not dwell on tests of other materials as the results are quite comparable with those of the X PLUS 3.
Talking about consumption the math is quick, it all depends on whether you use the hot chamber or not. With EVERYTHING turned on the maximum absorption is around 630/650w, if you mainly print PLA and PETG you will consume an average of 100W per hour, while if you mainly print with the chamber closed and heated the average consumption rises to around 350/450W depending on the environment in which the printer is placed. Remember that the chamber is not insulated so it tends to dissipate a lot of the heat generated.
Finally it is “slightly” less noisy. In hot chamber mode, with only the internal hot air fan and the small fan on the back of the card, settles at around 44 dB with the door and lid closed. Just open one of the two and it splashes over 50 easily. The situation gets worse, as with all printers , when all the fans are turned on: the one that blows on the piece and the auxiliary one to cool better at high speed. As always, we are above 60 Db unfortunately…
Conclusions
I'm kicking myself for having sold the X PLUS 3, they may be ugly all you want but... these QIDIs work well. Of course, like all printers they have their problems (see the glass-filled plastics that in some cases crack), the firmware is not super optimized and updated but... they print. And they print well right away without the need for any intervention.
If we're talking about bare and raw comparisons:
- Wins over the K1/K1C (same print volume) in terms of “out of the box” quality and equipment offered. However, it loses hands down on the optimization and firmware update front, LCD graphics and aesthetic appearance. On the final print quality, a “fixed” K1 works just as well. On the price side, at the moment that the Q1 PRO It is definitely preferable to the K1C, they are in direct contrast and it's up to you to choose the one you like best.
- A Bamboo Lab P1S today it is found at a higher price, in terms of aesthetics and software/firmware optimization there is no story. Bambu wins over all currently. If we talk about pure performance, the Qidi is superior to the P1S . Higher performing hotend, higher temperature of the bed and hotend, it has a hot chamber and a double leveling sensor. And then it costs significantly less. If you make it a question of print quality, taking one or the other does not change you, if you like multicolor take Bambu, if you have to print with a hot chamber well… go for QIDI!
I have printed practically nothing with the Q1 PRO, very little. As usual I focus more on other aspects during the review and I immediately notice if a printer works as it should or if it has defects as in the case of the K1. On this Q1 PRO I did not have to do anything at all, just plug it in, follow the 3 first calibration screens (it is strange that they do not make you adjust the input shaping and print bed at the first start...), load the filament and after the heating time of the chamber (20 minutes) I was already printing PCPBT loaded glass. It is definitely a printer that I will not sell any time soon and I will continue to test it by printing on it as I did with the X PLUS 3 (to tell the truth, not used very much…).
What more do you want? Well done Qidi , not a bad product for the price it is offered at!
Source: help3d.it


 3digital.tech